Thursday, 12 May 2016

Postmortem

I started off this project all other the place, switching ideas every week from asset creation to character design back to asset creation. I feel that if I hadn't been so unsure of what I wanted to do then I would have been able to get a lot more work done earlier in the project and hit all of my milestones. But there was always one thing that I knew I wanted to do and that was modelling and texturing.

When I settled on character design I was looking forward to it as Warframe is a game which I enjoy, this however turned out to be a burden as I would find myself getting distracted by the game itself. Also wanting to learn ZBrush to create the character was a bad choice as it is a very complicated program that would take years to perfect my skills in.

After the first presentation I was recommended to scale back my project and focus on single assets. This recommendation allowed me to focus on a more constrained goal and complete the project on time. Shortly after setting these goals however I found myself disliking anything that I made and I just didn't want to carry on doing something that I didn't like, which caused me to prioritise my other assignments over this one. When i did finally concentrate on this project I ended up really enjoying what i was doing and that in turn helped me create assets that I liked.

When setting out to texture my models I originally thought that Substance Painter would be amazing as on the surface it looks simple to use and the Warframe developers use it. However when it came to me actually using it to texture my model I just felt lost and confused. This is where I reverted back to doing things the way I know how and not trying to learn something new, but this was kind of good as it allowed me to regain some knowledge that I had forgotten.

What I think went well:
  • Learning how to sort the UVs for characters.
  • I have refreshed myself on how to make certain materials for textures such as normal maps and specular level maps.
  • I have leant to become more patient when texturing as now I know the more time I put into unwrapping the UVs the easier making each material will be.
What I think went bad:
  • I was not consistent with the blog as there was a few large gaps where there was no visibility.
  • I realised how much I had over scoped far too late and had to cut out an asset that I was going to make.
  • My research was very weak which caused many problems for me such as not creating any textures in substance painter in the end.
What I will take away from this project:
  • If you don't plan and research carefully you will have many problems.
  • If you aren't consistent you will fall out of the habit and get less done.
  • I found that once I had started working it was easier for me to keep working, I just found it hard to get myself to start anything. I will definitely remember this in the future.
I am quite disappointed by the fact that I couldn't get any in-game screenshots of any of my work due to steam workshop not allowing me to put my assets in the game, but this is okay as everything can easily be viewed in the Warframe TennoGen.

I feel that I could have pushed myself harder to keep on going with this project rather than leaving it on the back burner for so long, this would have allowed me to create better quality models/textures and be able to create all of my intended assets. Overall I think that if I was more consistent with blogging my work I would have realised my mistakes sooner, allowing me to move forward in the right direction instead of wasting as much time as I did fixating on the wrong things.

- Peter Howell

Bibliography


Slick, J. (2015). How Important are ZBrush / Mudbox to the Gaming Industry?. Available: http://3d.about.com/od/Gaming-In-3d/tp/How-Important-Are-Zbrush-Mudbox-To-The-Gaming-Industry.htm. Last accessed 9th Oct 2015.

Krautscheid, O. (2014). 3D Modelling Software: 5 Best Alternatives to Blender 3D. Available: http://windows7themes.net/en-us/3d-modelling-software-5-best-alternatives-to-blender-3d/. Last accessed 9th Oct 2015.

Jarratt, S. (2014). The top 7 sculpting apps for 3D artists. Available: http://www.creativebloq.com/audiovisual/sculpting-apps-81412712. Last accessed 9th Oct 2015.

Burgerman, J. (2015). 20 top character design tips. Available: http://www.creativebloq.com/character-design/tips-5132643?page=1. Last accessed 17th Oct 2015.

Mason, D. (2014). 15 pro character design tips. Available: http://www.creativebloq.com/3d/15-pro-character-design-tips-61412006. Last accessed 17th Oct 2015.

Nicacio, M. (2009). Making Of 'Zero'. Available: http://www.3dtotal.com/index_tutorial_detailed.php?id=217#.ViP5pn6rSUl. Last accessed 17th Oct 2015.

Hickinbottom, A. (2014). 3ds Max Character Creation. Available: http://www.3dtotal.com/index_tutorial_detailed.php?roPos=1&catDisplay=1&id=1963#.ViP6136rSUl. Last accessed 17th Oct 2015.

Romanenko, S. (2014). The making of 'Kroenen'. Available: http://www.3dtotal.com/index_tutorial_detailed.php?roPos=1&catDisplay=1&id=1886#.ViP7dX6rSUl. Last accessed 17th Oct 2015.

Tillman, B (2011). Creative Character Design. Oxford: Elsevier. p67-84, 85-101, 134.

Warframe. (2015). content creator art style guide. Available: https://warframe.com/steamworkshop/help/index.php?page=content-creator-art-style-guide. Last accessed 9th Nov 2015.

Bokaja. (2009). Character Modeling Pipeline. Available: http://www.interstellarmarines.com/articles/development/character-modeling-pipeline/. Last accessed 9th Nov 2015.

Tironeac, G. (2013). The Pipeline Behind Modeling and Animating a Game Character in Zelgor. Available: http://assist-software.net/blog/pipeline-behind-modeling-and-animating-game-character-zelgor. Last accessed 9th Nov 2015.

Boudon, G. (2013). Understanding a 3D Production Pipeline - Learning The Basics. Available: http://blog.digitaltutors.com/understanding-a-3d-production-pipeline-learning-the-basics/. Last accessed 9th Nov 2015.

Farid. (2007). "Yes, but how many polygons?" An artist blog entry with interesting numbers. Available: "Yes, but how many polygons?" An artist blog entry with interesting numbers. Last accessed 9th Nov 2015.


Pixologic. (2015). UV Master: UV Creation Has Never Been So Easy!.Available: http://pixologic.com/zbrush/features/UV-Master/. Last accessed 11 Nov 2015.

Scherer, M (2011). ZBrush 4 Sculpting for Games: Beginner's Guide. Birmingham: Packt Publishing. p71-83.

Pixologic. (2015). Polypaint. Available: http://pixologic.com/zbrush/features/PolyPaint/. Last accessed 11 Nov 2015.

Warframe. (2015). Tintmasks. Available: https://warframe.com/steamworkshop/help/index.php?page=tintmasks. Last accessed 17th Apr 2015.

Warframe. (2015). SUBSTANCE PAINTER SHADER. Available: https://warframe.com/steamworkshop/help/index.php?page=substance-painter-shader. Last accessed 17th Apr 2015.

Warframe. (2015). CREATING AN ALT HELM. Available: https://warframe.com/steamworkshop/help/index.php?page=polycount-creating-an-alt-helm. Last accessed 5th May 2015.

Warframe. (2015). CREATING A WARFRAME SKIN. Available: https://warframe.com/steamworkshop/help/index.php?page=creating-a-warframe-skin. Last accessed 17th Apr 2015.

Warframe. (2015). CREATING LISET SKINS. Available: https://warframe.com/steamworkshop/help/index.php?page=creating-liset-skins. Last accessed 29th Apr 2015.

AlphaBest. (2016). Bubbles Engineering. Available: https://www.alphabest.org/bubblesengineeringenrichment/. Last accessed 29th Apr 2015.

Warframe. (2015). TEXTURING GUIDE. Available: https://warframe.com/steamworkshop/help/index.php?page=texturing-guide. Last accessed 5th May 2015.

Warframe. (2015). SUBSTANCE PAINTER SHADER. Available: https://warframe.com/steamworkshop/help/index.php?page=substance-painter-shader. Last accessed 5th May 2015.

stpetersburgart. (2016). Dirt Texture Black And White. Available: http://stpetersburgart.com/dirt-texture-black-and-white. Last accessed 5th May 2015.

3D Character Artist: https://www.bungie.net/en/aboutus/index#page=careers&job=10067. Last accessed: 1st Nov 2015

3D Generalist: https://www.bungie.net/en/aboutus/index#page=careers&job=10100. Last Accessed: 1st Nov 2015

3D Artist: http://careers.ea.com/ea-career-search. Career Opportunities: 3D Artist (62861). Last accessed 1st Nov 2015

https://chc.tbe.taleo.net/chc04/ats/careers/requisition.jsp?org=GAMES2K&cws=1&rid=692
Last accessed 9th Oct 2015

https://epicgames.avature.net/careers/JobDetail/Cary-North-Carolina-United-States-Character-Modeler-Unannounced-Project/2046
Last accessed 9th Oct 2015

http://www.rockstargames.com/careers/position/3bd10643/rockstar-north
Last accessed 9th Oct 2015

http://www.telltalegames.com/jobs/?id=ob3qZfwn
Last accessed 9th Oct 2015

https://jobs.zenimax.com/requisitions/view/773

Last accessed 9th Oct 2015

- Peter Howell

Texturing the Mag helmet

Here are what  the UVs came out like on my first try, I thought that they turned out quite well but then I struck some problems in Substance Painter.


As I drew onto the helmet I noticed that a certain area didn't look right, its just at the bottom of the visor on either side. It turned out that the UVs were all messed up and needed fixing, looking over the specifications for the texture sizes again I realised that I rendered the UVs in the wrong size anyway.


Here are the revised UVs for the helmet, in the correct aspect ratio and no overlapping UVs.


I the put the helmet back into Substance Painter and applied the shader to it.


Soon after applying all the materials in Substance Painter I noticed that creating the textures this way is a lot harder than it previously seemed. I was unable to successfully apply any working materials, looking on line I couldn't find any fixes for this either. I then loaded the UVs into Photoshop and started to make the diffuse texture.

I started by getting a base colour down on each segment depending on where it would be located such as the back of the head, underneath and the visor are dark  where as the outer shell is light.


I then added wire around the texture as wires can be seen on pretty much all warframes within the game.


I added this texture as an overlay to give the helmet a gritty look as if it has been in battle recently, I think the effect worked quite well.


After applying the over lay i decided to create the normal map needed for the model, I did this by using a high pass filter to get the texture of the overlay to become prominent. Then I used the NVIDIA normal map tool.


I then removed the overlay from the visor and created another normal map as having the gritty visor looked wrong, I also toned down the overlay as the marks looked too deep.


Next i desaturated the diffuse map and moved around the levels to create the specular map which is then used as a metal map in the TennoGen. I also toook some time to create the ambient occlusion map in 3DS Max.


Here you can see that i have added the emissive map as the dots on the front have lit up, I also added the emissive map to the vents on the back of the helmet.


Finally I created the tint mask to finish the helmet.


After the problems that I had with creating the texture for the helmet I don't feel as though it is necessary to create a Syandanna as I have learnt how to create all the needed materials. Also creating the materials this way took up a great deal of time.

- Peter Howell

Warframe. (2015). TEXTURING GUIDE. Available: https://warframe.com/steamworkshop/help/index.php?page=texturing-guide. Last accessed 5th May 2015.

Warframe. (2015). SUBSTANCE PAINTER SHADER. Available: https://warframe.com/steamworkshop/help/index.php?page=substance-painter-shader. Last accessed 5th May 2015.

stpetersburgart. (2016). Dirt Texture Black And White. Available: http://stpetersburgart.com/dirt-texture-black-and-white. Last accessed 5th May 2015.

Liset Skin

Just like with the Excalibur skin I looked at the current skins for the Liset and decided I would be changing the tint mask of the Liset to create a new skin.


My initial thoughts for a Liset skin was bubbles inspired, so I knew I wanted to have multiple round shapes of varying sizes.


I started by taking away a lot of the lines and extra parts to make more room for the shapes that I wanted to add in.


Here is what the final skin looks like and the tint mask.


- Peter Howell

Warframe. (2015). CREATING LISET SKINS. Available: https://warframe.com/steamworkshop/help/index.php?page=creating-liset-skins. Last accessed 29th Apr 2015.

AlphaBest. (2016). Bubbles Engineering. Available: https://www.alphabest.org/bubblesengineeringenrichment/. Last accessed 29th Apr 2015.

Creating Excalibur Skin

To start creating a skin for Excalibur I looked at the skins that were already in the game, I noticed that the skins were mostly tint mask swaps which have some kind of theme to them such as fire.


I had an idea of plants or roots grasping the character so I started drawing wispy lines which had little offshoots to try and replicate what a root looks like.


I did this over the majority of the body until I ended up with this as the tint mask that would make up my skin.


Unfortunately I have been unable to get any screenshots of the skin within the game due to issues with the steam workshop, but I have got a preview of the skin in the TennoGen using the colour palette shown in one of my previous posts.


- Peter Howell

Warframe. (2015). CREATING A WARFRAME SKIN. Available: https://warframe.com/steamworkshop/help/index.php?page=creating-a-warframe-skin. Last accessed 17th Apr 2015.

Creating an alternate Mag helmet

One of my goals set is to create an alternate helmet for a Warframe, so I imported a model of Mag into 3DS Max to create it. I have a budget of 5000 tris to work within but I don't think that will be much of a problem for me though.

To start with I duplicated the original helmet and sliced it in half as I wanted to create a symmetrical helmet. I didnt want to stray too far away from the original helmet as then there might be problems when it is put back on the body.


I then cut the gas mask bits off of the front of the head and covered it over and smoothed it up a bit.


I gave the helmet a more prominent ridge around the visor and ear covers, I also added a raised parting down the centre of the helmet.


I added a piece which has a gap between the helmet and itself to give the impression of the helmet being held together by the magnetic powers of the character.


I then added little over hangs on the back of the helmet which are going to be vents.


Here is my finished helmet next to the original that I started with. The final poly count was 1190 polys.


I will create another post about the texturing of the helmet as I ran into a few problems.

- Peter Howell

Warframe. (2015). CREATING AN ALT HELM. Available: https://warframe.com/steamworkshop/help/index.php?page=polycount-creating-an-alt-helm. Last accessed 5th May 2015.

Substance Painter

After reading that Digital Extremes, the creators of Warframe, use Substance Painter to texture their models I decided to try it out. Substance Painter allows you to paint directly onto 3D models while applying all of the textures that are used on the models in Warframe.

After opening up the program and selecting the model that I want to paint this is what the UI looked like. At first I found this very overwhelming as I didn't know what anything was at first but I messed around with some of the settings and quickly learned what each window had in it. On the left you can see the model and on the right you can see the texture, you are able to paint directly onto either of these and it will affect both.


The paint properties window was in my opinion the most useful window, it allowed you to change the colour of the brush, the height of the brush strokes (I later realised this is the Normal map), the roughness and how metallic the colour is. In this window it is also possible to change the brush shape or even use a stencil as the brush.


I noticed that there was a guide for the shaders that are used in the creation of textures so I followed their guide and put them into Substance Painter. This shader tries to emulate what the object will look like if it was in the game. I will show this later when I am creating the textures for my models in Substance Painter.

- Peter

Warframe. (2015). SUBSTANCE PAINTER SHADER. Available: https://warframe.com/steamworkshop/help/index.php?page=substance-painter-shader. Last accessed 17th Apr 2015.

Warframe TennoGen and Tint Masks

In this post I will be talking about my experiences with the Warframe Tennogen, a tool used to collect and put together assets for Warframe.

This is what I was given after I imported the Excalibur model and added all of the body textures to the correct slots.


To see how easy it was to change textures in Tennogen I altered the Diffuse of the Excalibur texture by adding 2 different coloured lines to it.


I then simply dragged the new diffuse texture into the editor and it changed instantly, making the whole process of adding new textures fast and simple.


After some time I realised that changing the colours on the tint mask material had no effect on the textures. The problem was that there was no alpha mask, so I needed to add that in manually. To do this I had to install the SuperPNG Photoshop plug-in and as I dragged the tint mask file into Photoshop I had to hold shift. This window would pop up. I had to make sure that I clicked 'Alpha appears as separate channel' and then add the alpha channel in the channels tab in Photoshop.


This is what the tint mask for the Excalibur looks like, each colour corresponds to a different section of the texture that can be coloured within game. There are 5 Different sections in total: Black, White, Red, Green and Blue, the black section is the part of the texture which wont be affected by the tint mask.


This is what the character would like like if there were no colours selected for the tint mask, it would just show the diffuse colours.


This is after colours have been applied to the tint mask using the in game colour palettes, it tints the selected areas with the chosen colours.


Overall I think that the TennoGen tool is very simple and easy to use, the tint masks are easy to understand also.

- Peter Howell

Warframe. (2015). Tintmasks. Available: https://warframe.com/steamworkshop/help/index.php?page=tintmasks. Last accessed 17th Apr 2015.

Sunday, 28 February 2016

Changes to the project

After feedback and thinking on it I have decided to change the direction of my project from character design to asset creation. The thought process behind this is: the style guide that I am following only covers asset creation for the game, this would allow me to follow a more constrained creation process. The assets that I can create following this style guide are: Warframe skins, Syandannas, Liset skins and alternate helms.

Here are the constraints that I would be following for each asset type.

Warframe skin:
6 2048 x 2048 textures:
Albedo (filename_d)
Normal (filename_n)
Specular (filename_s)
Roughness (filename_r)
Emissive (filename_e)
Tint mask (filenameTintMask_d)

Syandanna:
7500 triangles
6 1024 x1024 textures:
Albedo (filename_d)
Normal (filename_n)
Specular (filename_s)
Roughness (filename_r)
Emissive (filename_e)
Tint mask (filenameTintMask_d)

Liset skin:
6 2048 x 2048 textures:
Albedo (filename_d)
Normal (filename_n)
Specular (filename_s)
Roughness (filename_r)
Emissive (filename_e)
Tint mask (filenameTintMask_d)

Alt helm:
5000 triangles
6 2048 x 1024 textures:
Albedo (filename_d)
Normal (filename_n)
Specular (filename_s)
Roughness (filename_r)
Emissive (filename_e)
Tint mask (filenameTintMask_d)

Looking at the time I have left for this project I believe that I will be able to make at least one of each of these assets. I will be making a follow up post explaining in more detail what i will be doing for each of these assets.

- Peter Howell

Tuesday, 2 February 2016

First Concepts

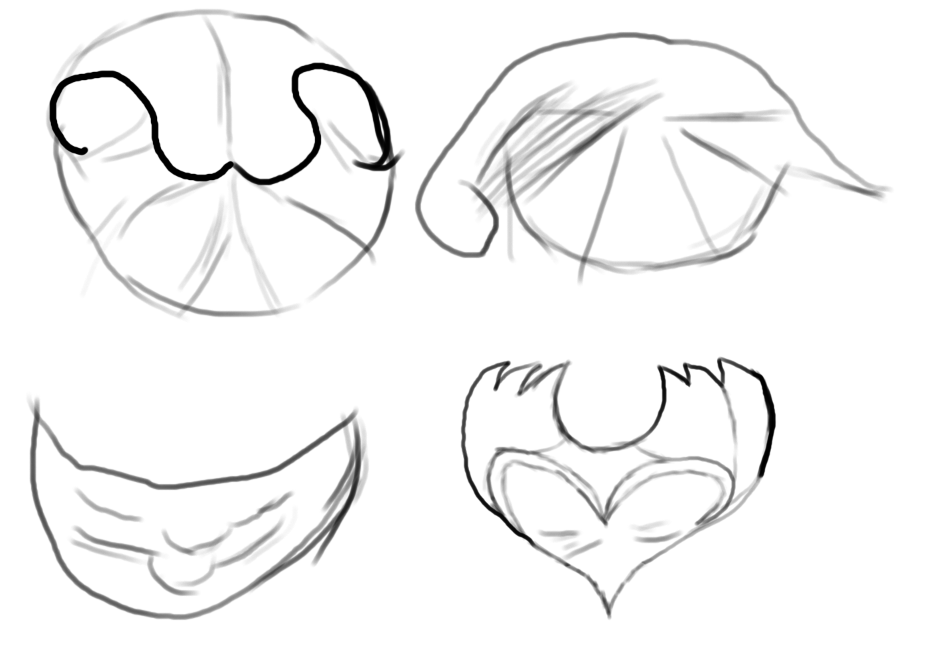
Before I started to create concept art for my character I decided to look into different things for inspiration. I started by looking into other games, one in particular: Ninja Gaiden. This is what I quickly drew up from inspiration from the main character.
After drawing this I felt as though I needed to strip down my inspirations to a more broad spectrum. Going back to the drawing board I looked into the elements such as water and fire which is when I drew these.
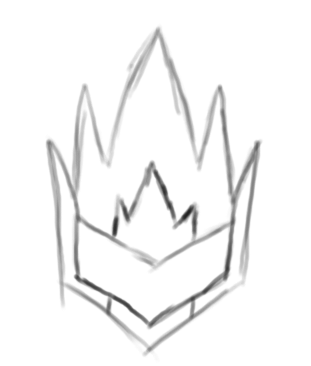
I still wasn't happy with these so I decided to use ice as an inspiration and came up with this.
Now I was much happier with this and was about to start concept art for the body when I remembered that there is already a character in Warframe that uses the powers of ice. I chose to instead tweak this and instead use crystals rather than ice.


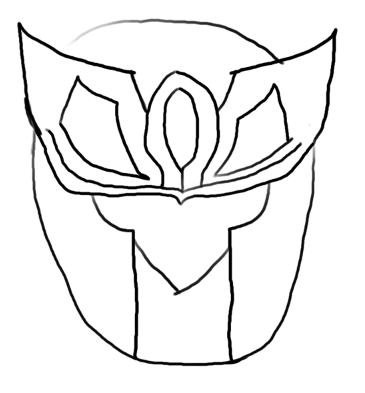
In this picture I drew a redesigned helmet using my previous one as reference, i also drew a possible arm design.


Here I cleaned up the helmet a bit and drew a body and legs. I feel as though I can start modelling the helmet from here as I draw up some more concepts for my characters body and legs.

- Peter Howell


Thursday, 12 November 2015

Unwrapping and Texturing

I have decided that I would like to texture my character once it has been created, but this leads to some problems that i need answers for. These problems are: how to unwrap high poly models,

Unwrapping UV's

After doing some research I have found some ways in which i can unwrap the UV's, the first method is to import the model into 3DS Max and then unwrap and organise the UV's manually. Another method that I found was a plug-in that you can install into ZBrush that will create a fully organised set of UV's for you. Personally I think I will use the plug-in as it will save a lot of time which will allow me to focus on creating a good texture for my character.

Texturing

I have also been curious to find out how difficult it would be to texture a high-poly model as the UV's would be quite small. But I have found another plug-in for ZBrush which allows you to paint directly onto the model, this plug-in is named Polypaint. I think this would be really useful as it lets you skip past UV unwrapping.

I think that both of these tools will be very useful when it comes to texturing a high-poly model and I would like to use them for my final product

- Peter Howell

Readings:

Pixologic. (2015). UV Master: UV Creation Has Never Been So Easy!.Available: http://pixologic.com/zbrush/features/UV-Master/. Last accessed 11 Nov 2015.

Scherer, M (2011). ZBrush 4 Sculpting for Games: Beginner's Guide. Birmingham: Packt Publishing. p71-83.

Pixologic. (2015). Polypaint. Available: http://pixologic.com/zbrush/features/PolyPaint/. Last accessed 11 Nov 2015.

Monday, 9 November 2015

Poly Count

Now that I have decided what I am going to be creating I need to limit myself so that I don't over scope. I have started by looking at the poly count of models that are already in published games. Here is what I have found:

Samus Aran, Metriod Prime
8,464 Polys

Excalibur, Warframe
6,480 Polys

Julia, Tekken Tag Tournament
7,700 Polys

Kratos, God of War 3
22,955 Polys

Spiderman, The Amazing Spiderman
11,652

Asura, Asura's Wrath
23,139 Polys when character has 6 arms/16,000 Polys when character has 2 arms

Hayden Tenno, Dark Sector
10,671 Polys

Ryu Hyabusa, Dead or Alive 5
30,613 Polys

Civilian, Halo: Reach
15,808

Main Characters, Kingdom Under Fire: The Crusaders
around 10,000 Polys

Faith, Mirrors Edge
22,000 Polys

Jin Kazama, Tekken Tag Tournament 2
19,272 Polys

Looking at all of these poly counts it makes me realise just how many polys go into creating a game character. I think that my poly count budget for the Low-Poly Model will be 1,000, for the High-Poly Model I was thinking that 15,000 polys would be a realistic amount of polys, but after seeing the poly count of a character in Warframe I have decided that 10,000 polys would be better.

- Peter Howell

Readings:

Farid. (2007). "Yes, but how many polygons?" An artist blog entry with interesting numbers. Available: "Yes, but how many polygons?" An artist blog entry with interesting numbers. Last accessed 9th Nov 2015.

Pipeline

Over the past week I have sat down and tried to think of games in which I really like the character designs, so that I have something to base my character design on. The game that I have chosen to create a character for is Warframe. The reason for this is is that there is already a art style guide which has been created to help people create characters for the game. This guide states that the characters need to be: Sleek, Technology and organic forms mixed, Elegant Curves, Minimalism and Flowing Silhouettes. There is also a quick bio to help with the design of the character: "We are a mix of high tech warrior and ninja.  We wear the distinct techno-organic Warframes dating back to the old war and beyond.  With our Warframes we command unearthly power and our skill with gun and blade is legendary."

Looking at 3D modelling pipelines online i have found out that that the order of work is like this:
  1. Concept
  2. Low-Poly Model
  3. High-Poly Model
  4. Unwrapping
  5. Texturing
  6. Rigging
  7. Animating
  8. Rendering
What these consist of:

Concept
This is a drawing/painting to grasp the style and look of the character I will be designing.

Low-Poly Model
A Low-Poly count model of the character I am creating. This is usually done in box modelling software such as 3ds Max.

High-Poly Model
A High-Poly count model of the character I am creating. This is usually done in sculpting software such as zbrush or Mudbox.

UV Unwrapping
Separating and placing the UV's into groups to make texturing easier.

Texturing
Painting the UV's to give the character a skin.

Rigging
Placing bones into the character to allow for animating.

Animating
Posing the character over many key frames to make the character move.

Rendering
Exporting the character to work within a game/movie.

Personally I think that i will only be doing Concept, Low-Poly Model, High-Poly Model and rendering. As i want my project to be based around modelling and not texturing or animating. So the pipeline that i will be following is:
  1. Concept
  2. Low-Poly Model
  3. High-Poly Model
  4. Rendering
- Peter Howell

Readings:

Pipelines:

Bokaja. (2009). Character Modeling Pipeline. Available: http://www.interstellarmarines.com/articles/development/character-modeling-pipeline/. Last accessed 9th Nov 2015.

Tironeac, G. (2013). The Pipeline Behind Modeling and Animating a Game Character in Zelgor. Available: http://assist-software.net/blog/pipeline-behind-modeling-and-animating-game-character-zelgor. Last accessed 9th Nov 2015.

Boudon, G. (2013). Understanding a 3D Production Pipeline - Learning The Basics. Available: http://blog.digitaltutors.com/understanding-a-3d-production-pipeline-learning-the-basics/. Last accessed 9th Nov 2015.

Style Guide:

Warframe. (2015). content creator art style guide. Available: https://warframe.com/steamworkshop/help/index.php?page=content-creator-art-style-guide. Last accessed 9th Nov 2015.


Sunday, 1 November 2015

Job search

I have done another job search to try to help me narrow down what skills I would need in order to become a 3D model artist within the gaming industry. This time I have made sure to not look at senior or lead roles as it is highly unlikely that I would get one of them jobs straight out of education. Here is what I have found.

Bungie:
3D Character Artist:
  • University or equivalent art-related degree focusing on traditional skills such as sketching, illustration, and painting.
  • Two or more years of professional game industry experience.
  • At least one shipped title as 3D character artist.
  • A portfolio or demo reel that demonstrates an exceptional understanding of human anatomy and a creative imagination with a keen eye towards form, shape, structure, and silhouette in regards to modeling.
  • Be fluent in 3D Max or Maya, Photoshop, Zbrush and/or Mudbox.
  • Experience creating high-poly models for normal ripping purposes.
  • Good communication skills and the ability to work well in a team environment.
  • Passion and desire to create great games.

3D Generalist:
  • Undergraduate degree or completion of a certificate program that provides an education in the fundamentals of art
  • Strong sense of surface development, proportion, and mechanical functionality
  • Strong artistic sense balanced with good technical knowledge
  • Two or more years of proven experience creating inorganic objects in a feature film or game production environment
  • One or more years of experience working as a 3D Artist on a shipped game title
  • Sketching, drawing, painting and design skills desirable
  • Thorough knowledge of 3D Max or Maya, Photoshop, Zbrush, Mudbox and other 2D/3D applications
  • Experience creating high-poly models for normal ripping purposes
  • Experience creating rigs and simple animations for machines
  • Good communication skills and the ability to work well in a team environment
  • Passion and desire to create great games
EA:
3D Artist:

  • A strong 3D portfolio showcasing top notch environment and/or hard-surface modeling.
  • Demonstrable knowledge of lighting, color, and composition.
  • Must have a technical aptitude.
  • Experience in creating art for use in real-time 3D game engines.
  • Excellent organizational skills.
  • Strong written and verbal English communication skills.
  • A team oriented personality and work well within a group
  • Able to create concept art for modeling
  • Ability to create 3D models based on ready concepts
  • 2D experience and strong Photoshop skills
  • Passion for games.

While looking at these applications I listed down what they all had in common, here is that list:

  • Knowledge of 3D modelling software
  • Knowledge of Photoshop
  • Good Communication skills
  • Good at drawing/sketching
  • A passion for games


Jobs:

3D Character Artist: https://www.bungie.net/en/aboutus/index#page=careers&job=10067. Last accessed: 1st Nov 2015

3D Generalist: https://www.bungie.net/en/aboutus/index#page=careers&job=10100. Last Accessed: 1st Nov 2015

3D Artist: http://careers.ea.com/ea-career-search. Career Opportunities: 3D Artist (62861). Last accessed 1st Nov 2015


Character Designs Within Games

After some discussion have decided it would be best that I design and create only one character. This character will be created for a game which already exists. The reason for this is so that I will already have a defined theme in which I should follow in order to create the character.

Assassins Creed, Fallout 3 and Halo are all games with consistent character design, so lets look at the characters in them games.

The Assassins Creed series is set in multiple eras so the design of the characters change slightly but they still follow the same theme.
The consistencies between all these characters are: their hoods/hats all have a point on them, they have multiple belts/straps, they use light colours and they all have the assassins symbol which is usually located on their belts. So if I was to create a character for this game I would make sure that their clothes are white or light grey, their hood is pointed they have belts and straps and you can clearly see the assassins logo.

In Fallout 3 all the characters are wearing clothes from the 50's. Here are a few examples:
All the clothes seen here, apart form the armoured suits, are all highly based off of clothes that were worn in the 50's. The characters seen above are also all covered in patches of dirt/sweat. If i was to design a character for this game I would research into what clothes were worn in the 50's then create a design based off that research.

Halo has multiple archetypes so lets just use one of them as an example. Here is what the Promethean look like:
As you can see these characters are based off of animals with top ones being based on humans and the bottom ones being based on a dog or big cat. The colours that are used here are light to dark grey and orange. If I was to create a character for this game I would first decide what animal I want the character based off of then slowly start to make it look mechanical and add the orange lights.

I still am unsure what game I would like to design a character for but I will and choose a game soon.

- Peter Howell

Friday, 23 October 2015

Character Design

After my past few posts I've really been wanting to narrow down what it is I want to do for my final project. As I personally feel that 3D modelling is my strongest point that is where I started, I wanted to expand on my skills in 3D modelling by learning sculpting software. Although I thought this was a good idea at the time I now realise that this would have only hindered my learning as it would have been split between two areas. In my last post I mentioned looking into character design and 3D modelling but after reading Bryan Tillman's Creative character design I feel inspired to design characters.

Tillman goes on to talk about certain shapes such as squares, triangles and circles being used in character design. They all have a different meaning, squares try to convey stability, trust, honesty, order, comfort, security, equality and masculinity. Triangles mean action, aggression, energy, sneakiness, conflict and tension. Circles mean completeness, gracefulness, playfulness, comforting, unity, protection and childlike. Here are few example of characters that I have found that use shapes in their design and what shapes they have incorporated into them and what that means.

This character is master Chief from the Halo series. The design for this character looks very rigid and square because of all of the large plates of armour. I think that the qualities you can see in this characters design are masculinity, security and conformity. I have chosen these aspects because master chief is a super-soldier that always follows the orders which he is given,

This character is Tahm Kench form League of Legends. One of the first things you notice about him is that he is fat and round, incorporating a circle into his design. In the game this character can potentially consume another player, becoming one with them, in order to protect them. I believe that the qualities that lend to this characters circle design are unity and protection.

This character is Ryu Hyabusa form the Ninja Gaiden series. Looking at this character I can see that triangles have been used in its design. As stated earlier triangles could mean action, aggression and energy. This character has all 3 of these qualities in game as the game is a fast paced action game in which you have to defeat many enemies in quick succession.

When designing a character I will use the three-point turnaround to display my designs because the three-point turnaround is the industry standard for video games (Bryan Tillman, 2011). Tillman talks about using references in everything that you draw and how important it is to understand the human anatomy. I will start using people as reference while travelling to and from university and insert them in my future posts to show my progress.

- Peter Howell

Readings:

Tillman, B (2011). Creative Character Design. Oxford: Elsevier. p67-84, 85-101, 134.